環境
- Windows 10 Pro 2004
- Oracle VM VirtualBox 6.1.12 (2020/07/14)
- Oracle VM VirtualBox 6.1.12 Extension Pack
- CentOS Linux 7 (2003) (2020/04/27)
- nvm v0.35.3 (2020/03/06)
- node v12.18.3 (npm v6.14.6) (2020/07/22)
- Git 2.24.3 (IUS版)
- AWS Amplify CLI 4.27.2
- Vue CLI 4.5.4
ディレクトリ構成
/
+-home
    +-mizuki
        +-.amplify
        +-.aws
        +-.nvm
        |   +-versions
        |       +-node
        |           +-v12.18.3
        |               +-bin
        |                   |-amplify -> ../lib/node_modules/@aws-amplify/cli/bin/amplify
        |                   |-vue -> ../lib/node_modules/@vue/cli/bin/vue.js
        |
        +-workspace
            +-aws
                +-myamplifyproject
                    +-amplify
                    |   +-backend
                    |       +-api
                    |           +-myapi
                    |               |-schema.graphql
                    |
                    +-src
                        |-aws-exports.js
                        |-main.js
概要
Vueを使ったWebアプリケーションの開発の準備の手順
- Amplify CLIをグローバルインストールする
- Amplify CLIにAWSアカウントのIAMユーザーを設定する(プロファイルの作成)
- Vueアプリケーションのプロジェクトを作成する
- VueアプリケーションのプロジェクトでAmplifyのバックエンド(AWS)を初期化する(作成済みプロファイルの選択)
- VueアプリケーションのプロジェクトにAmplifyのライブラリをインストールする
- VueアプリケーションにAmplifyのライブラリを組み込む
VueアプリケーションからGraphQL APIを経由してDynamoDBデータベースに接続する手順
- GraphQL APIをローカルに作成する
- ローカルに作成したGraphQL APIをバックエンド(AWS)へデプロイする
- GraphQL APIのフロントエンド側のコードを作成する
- Vueアプリケーションからバックエンド(AWS)のGraphQL APIを呼び出す
VueアプリケーションにAmazon Cognitoを使ったユーザー名/パスワードのログインを追加する手順
- 認証サービスをローカルに作成する
- ローカルに作成した認証サービスをバックエンド(AWS)へデプロイする
- VueアプリケーションにログインのUIを組み込む
Vueアプリケーションを公開する手順
- 公開サービスをローカルに作成する
- Vueアプリケーションを公開する
参考
- AWS Amplify
- AWS Amplify > Get started for free > Develop your Mobile or Web App
1. Vueを使ったWebアプリケーションの開発の準備
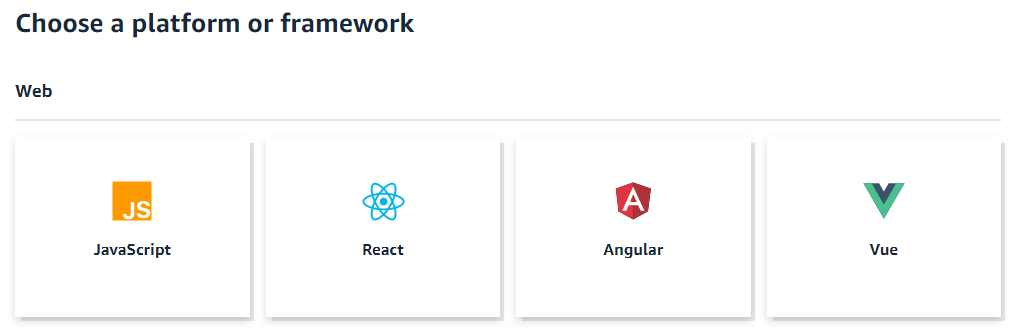
1-1. フレームワークを選択する
Getting started > Choose a platform or framework
"Vue"を選択してVue用のドキュメントを読んでいく。
1-2. Amplify CLIをインストールする
Vue > Getting started > Start the Tutorial > Prerequisites
前提条件
- Node.js v10.x or later
- npm v5.x or later
- git v2.14.1 or later
環境の確認
# Node Version Managerのバージョンを確認する
$ nvm --version
0.35.3

# Node Version Managerでインストール可能なNode.jsのバージョンを確認する
$ nvm ls-remote
->     v12.18.3   (Latest LTS: Erbium)

# Node Version Managerでインストール済みのNode.jsのバージョンを確認する
$ nvm ls
->     v12.18.3
default -> 12.18.3 (-> v12.18.3)
node -> stable (-> v12.18.3) (default)
stable -> 12.18 (-> v12.18.3) (default)

# インストール済みのNode.jsのバージョンを確認する
$ node -v
v12.18.3

# インストール済みのNode package managerのバージョンを確認する
$ npm -v
6.14.6

# インストール済みのGitのバージョンを確認する
$ git --version
git version 2.24.3
Amplify CLIをインストールする前にAWSのアカウントを作成しておく。
Amplify CLIをグローバルインストールする。
$ cd /home/mizuki/workspace/aws

# Amplify CLIをグローバルインストールする
$ npm install -g @aws-amplify/cli
----------------------------------------
Successfully installed the Amplify CLI
----------------------------------------
+ @aws-amplify/cli@4.27.2
added 1125 packages from 723 contributors and audited 1126 packages in 71.864s

# このあたりにインストールされている
/home/mizuki/.nvm/versions/node/v12.18.3/bin/amplify -> /home/mizuki/.nvm/versions/node/v12.18.3/lib/node_modules/@aws-amplify/cli/bin/amplify
注意。Amplify CLIをローカルインストールしてnpxコマンドで使用することはできない。
1-3. Amplify CLIの設定を行う
$ cd /home/mizuki/workspace/aws

$ amplify configure

# 1. ブラウザが起動するのでAWS管理コンソールにログインする
# 2. 端末に戻ってEnterを押下してリージョンの選択を行う
       ap-northeast-1 アジアパシフィック (東京)
# 3. IAMユーザー名を入力する
       既存のIAMユーザーが存在しなくてもブラウザの画面が切り替わって
       適切なオプションでIAMユーザーの作成が行える
         Access type: Programmatic access
         Policy name: AdministratorAccess
# 4. IAMユーザーのアクセスキーを入力する
       AWS管理コンソールのIAMユーザーのリストに表示されている
       アクセスキーを入力する
# 5. IAMユーザーのシークレットアクセスキーを入力する
       AWS管理コンソールのIAMユーザーのリストのシークレットアクセスキー欄の
       表示リンクをクリックして表示されたシークレットアクセスキーを入力する
# 6. プロファイル名を入力する
       (default)のままEnterを押下する
参考
1-4. Vueアプリケーションのプロジェクトを作成する
Vue > Tutorial > Set up fullstack project > Create a new Vue app
Vue CLIをグローバルインストールする。
$ cd /home/mizuki/workspace/aws

# Vue CLIをグローバルインストールする
$ npm install -g @vue/cli
+ @vue/cli@4.5.4
added 1304 packages from 698 contributors in 56.176s
Vue CLIを使ってVueアプリケーションのプロジェクトを作成する。
$ cd /home/mizuki/workspace/aws
# Vue CLIを使ってVueアプリケーションのプロジェクトを作成する
$ vue create myamplifyproject
? Your connection to the default npm registry seems to be slow.
Use https://registry.npm.taobao.org for faster installation? (Y/n) [y]
# Vue2のデフォルトを選択する
Vue CLI v4.5.4
? Please pick a preset: (Use arrow keys)
❯ Default ([Vue 2] babel, eslint) <--
Default (Vue 3 Preview) ([Vue 3] babel, eslint)
Manually select features
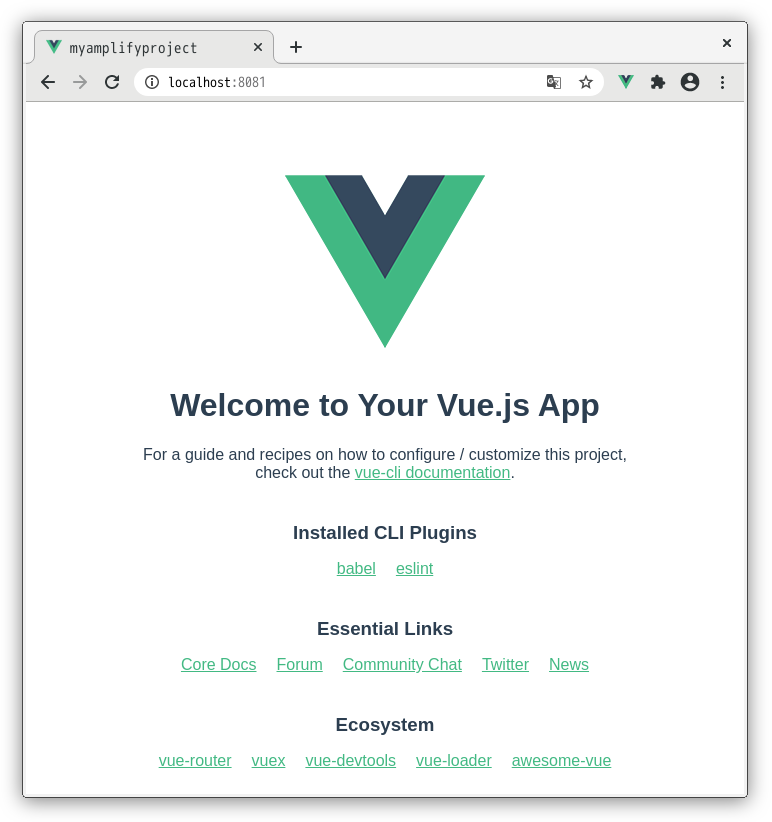
# プロジェクトに必要なモジュールをインストールしてからブラウザで表示する
$ cd myamplifyproject
$ npm install
$ npm run serve
http://localhost:8081/
1-5. VueアプリケーションのプロジェクトでAmplifyのバックエンド(AWS)を初期化する
Vue > Tutorial > Set up fullstack project > Initialize a new backend
$ cd /home/mizuki/workspace/aws/myamplifyproject

# プロジェクトの最上位ディレクトリで実行する
$ amplify init

# バックエンドのプロジェクト名を指定する
? Enter a name for the project (myamplifyproject) [todo]

# バックエンドの環境を指定する (dev, staging, and production)
? Enter a name for the environment (dev) [dev]

# Amplify CLIで使用するエディタを指定する
? Choose your default editor: (Use arrow keys)
❯ Visual Studio Code <--
  Atom Editor
  Sublime Text
  IntelliJ IDEA
  Vim (via Terminal, Mac OS only)
  Emacs (via Terminal, Mac OS only)
  None

# アプリケーションのタイプを指定する
? Choose the type of app that you're building (Use arrow keys)
  android
  ios
❯ javascript <--

? What javascript framework are you using (Use arrow keys)
  angular
  ember
  ionic
  react
  react-native
❯ vue <--
  none

# プロジェクトのソースファイルのディレクトリ名を指定する
? Source Directory Path:  (src) [src]

# プロジェクトの配布ファイルのディレクトリ名を指定する
? Distribution Directory Path: (dist) [dist]

# ビルドコマンドを指定する
? Build Command:  (npm run-script build) [npm run-script build]

# 開発用サーバーの起動コマンドを指定する
? Start Command: (npm run-script serve) [npm run-script serve]

# 作成済みのAWSアカウントのIAMユーザーのプロファイルを使用する
? Do you want to use an AWS profile? (Y/n) [y]
? Please choose the profile you want to use (Use arrow keys)
❯ default <--

# AWS側の環境が構築される
Your project has been successfully initialized and connected to the cloud!
参考
- AWS Command Line Interface > Configuring the AWS CLI > Named profiles
1-6. VueアプリケーションのプロジェクトにAmplifyのライブラリをインストールする
Vue > Tutorial > Set up fullstack project > Install Amplify libraries
$ cd /home/mizuki/workspace/aws/myamplifyproject

# Amplifyのライブラリをインストールする
$ npm install aws-amplify @aws-amplify/ui-vue
+ @aws-amplify/ui-vue@0.2.14
+ aws-amplify@3.0.24
added 155 packages from 423 contributors and audited 1455 packages in 35.415s
1-7. VueアプリケーションにAmplifyのライブラリを組み込む
Vue > Tutorial > Set up fullstack project > Set up frontend
追加するコード
import Amplify from 'aws-amplify';
import '@aws-amplify/ui-vue';
import aws_exports from './aws-exports';

Amplify.configure(aws_exports);
/home/mizuki/workspace/aws/myamplifyproject/src/main.js
import Vue from 'vue'
import App from './App.vue'
import Amplify from 'aws-amplify';
import '@aws-amplify/ui-vue';
import aws_exports from './aws-exports';

Amplify.configure(aws_exports);

Vue.config.productionTip = false

new Vue({
  render: h => h(App),
}).$mount('#app')
2. VueアプリケーションからGraphQL APIを経由してDynamoDBデータベースに接続する
2-1. GraphQL APIをローカルに作成する
Vue > Tutorial > Connect API and database to the app > Create GraphQL API and database
$ cd /home/mizuki/workspace/aws/myamplifyproject

# GraphQL APIを作成する
$ amplify add api

? Please select from one of the below mentioned services: (Use arrow keys)
❯ GraphQL <--
  REST

? Provide API name: (todo) [myapi]

? Choose the default authorization type for the API (Use arrow keys)
❯ API key <--
  Amazon Cognito User Pool
  IAM
  OpenID Connect

? Enter a description for the API key: [demo]

? After how many days from now the API key should expire (1-365): (7) [7]

? Do you want to configure advanced settings for the GraphQL API (Use arrow keys)
❯ No, I am done. <--
  Yes, I want to make some additional changes.

? Do you have an annotated GraphQL schema? (y/N) [n]

? Choose a schema template: (Use arrow keys)
❯ Single object with fields (e.g., “Todo” with ID, name, description) <--
  One-to-many relationship (e.g., “Blogs” with “Posts” and “Comments”)

The following types do not have '@auth' enabled. Consider using @auth with @model
  - Todo
Learn more about @auth here: https://docs.amplify.aws/cli/graphql-transformer/directives#auth

GraphQL schema compiled successfully.
Edit your schema at /home/mizuki/workspace/aws/myamplifyproject/amplify/backend/api/myapi/schema.graphql or place .graphql files in a directory at /home/mizuki/workspace/aws/myamplifyproject/amplify/backend/api/myapi/schema

# テキストエディタが起動する
# ここでは生成されたファイルの内容の確認だけで作業はない
? Do you want to edit the schema now? (y/N) [y]

Please edit the file in your editor: /home/mizuki/workspace/aws/myamplifyproject/amplify/backend/api/myapi/schema.graphql
Successfully added resource myapi locally

Some next steps:
"amplify push" will build all your local backend resources and provision it in the cloud
"amplify publish" will build all your local backend and frontend resources (if you have hosting category added) and provision it in the cloud
参考
- AWS AppSync 開発者ガイド > セキュリティ > 認証のユースケース > API_KEY 認証
API キーは、アプリケーションにハードコードされた値です。
API キーは、パブリック API の公開が安全であるユースケース、または開発目的での使用が推奨されます。
/home/mizuki/workspace/aws/myamplifyproject/amplify/backend/api/myapi/schema.graphql
type Todo @model {
  id: ID!
  name: String!
  description: String
}
参考
- "ID型"はAWS AppSyncのスカラー型
ID スカラー型は一意の ID を表し、オブジェクトの再取得のため、またはキャッシュのキーとしてよく使用されます。ID 型は文字列と同じ方法でシリアル化されますが、ID をフィールドとして定義することは、人間による読み取りを想定していないことを意味します。
- "ID型"はAWS AppSyncのDynamoDBリゾルバーによってデフォルトで自動的に挿入されるようになっている?
このチュートリアルでは、DynamoDB に挿入される新しい項目をインデックス付けする GraphQL ID! 型が、クライアントの引数の一部として渡されることを指定しています。AWS AppSync には、$utils.autoId() という ID 自動生成用のユーティリティが付属していて、"id" : { "S" : "${$utils.autoId()}" } の形式で使用することもできます。そのため、id: ID! を addPost() のスキーマ定義から除外するだけで、自動的に挿入されます。このチュートリアルではこの手法を使用しませんが、DynamoDB テーブルに書き込む場合はこの手法を検討することをお勧めします。
- "!"はGraphQLの必須項目を表す
2-2. ローカルに作成したGraphQL APIをバックエンド(AWS)へデプロイする
Vue > Tutorial > Connect API and database to the app > Deploy your GraphQL API
$ cd /home/mizuki/workspace/aws/myamplifyproject

$ amplify push
Scanning for plugins...
Plugin scan successful
✔ Successfully pulled backend environment dev from the cloud.

Current Environment: dev

| Category | Resource name | Operation | Provider plugin   |
| -------- | ------------- | --------- | ----------------- |
| Api      | myapi         | Create    | awscloudformation |
? Are you sure you want to continue? (Y/n) [y]

The following types do not have '@auth' enabled. Consider using @auth with @model
  - Todo
Learn more about @auth here: https://docs.amplify.aws/cli/graphql-transformer/directives#auth

GraphQL schema compiled successfully.
Edit your schema at /home/mizuki/workspace/aws/myamplifyproject/amplify/backend/api/myapi/schema.graphql or place .graphql files in a directory at /home/mizuki/workspace/aws/myamplifyproject/amplify/backend/api/myapi/schema
2-3. GraphQL APIのフロントエンド側のコードを作成する
Vue > Tutorial > Connect API and database to the app > Generate frontend code for the GraphQL API
? Do you want to generate code for your newly created GraphQL API (Y/n) [y]

? Choose the code generation language target (Use arrow keys)
❯ javascript <--
  typescript
  flow

# 生成したGraphQLのファイル群をsrcディレクトリ配下に出力するという指定
? Enter the file name pattern of graphql queries, mutations and subscriptions (src/graphql/**/*.js) [src/graphql/**/*.js]

? Do you want to generate/update all possible GraphQL operations - queries, mutations and subscriptions (Y/n) [y]

? Enter maximum statement depth [increase from default if your schema is deeply nested] (2) [2]

# 作業が始まり時間が掛かる
# 終了するとGraphQLのエンドポイントとAPIキーが表示される
2-4. Amplifyのステータスを確認する
$ amplify status

Current Environment: dev

| Category | Resource name | Operation | Provider plugin   |
| -------- | ------------- | --------- | ----------------- |
| Api      | myapi         | No Change | awscloudformation |
2-5. GraphQL APIのテストを行う
Vue > Tutorial > Connect API and database to the app > Testing your API
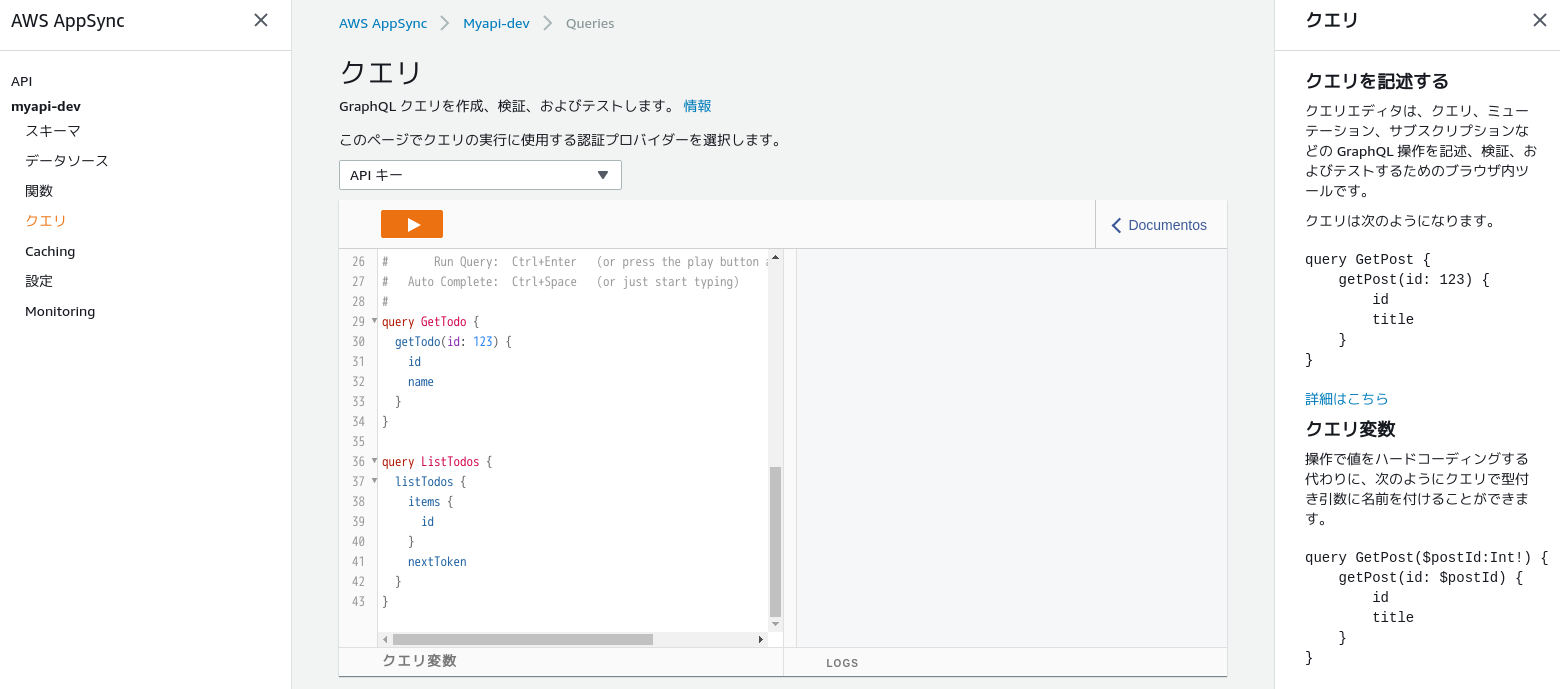
$ amplify console

# ブラウザが起動してAWS AppSyncコンソールが表示される
# ブラウザ上でGraphQLクエリを作成、検証、およびテストできる
AWS AppSync > API > myapi-dev > Queries
# Keyboard shortcuts:
#
#  Prettify Query:  Ctrl+Shift+P (also removes comments)
#       Run Query:  Ctrl+Enter   (or press the play button above)
#   Auto Complete:  Ctrl+Space   (or just start typing)
- "情報"リンクをクリックすると右側にGraphQLに関する説明が出る。
- "Documentos" > "Query"をクリックすると定義済みのクエリが表示される。引数や戻り値をクリックして詳細を見ることができる。
- 実行ボタン押下で複数のクエリからひとつを選んで実行できる。
データの登録
mutation CreateTodo {
  createTodo(input: {id:1,name:"test1",description:"desc1"}) {
    id
    name
    description
    createdAt
    updatedAt
  }
}
データの登録の戻り値
{
  "data": {
    "createTodo": {
      "id": "1",
      "name": "test1",
      "description": "desc1",
      "createdAt": "2020-08-22T09:25:31.542Z",
      "updatedAt": "2020-08-22T09:25:31.542Z"
    }
  }
}
単一データの取得
query GetTodo {
  getTodo(id: 1) {
    id
    name
    description
  }
}
単一データの取得の戻り値
{
  "data": {
    "getTodo": {
      "id": "1",
      "name": "test1",
      "description": "desc1"
    }
  }
}
複数データの取得
query ListTodos {
  listTodos {
    items {
      id
      name
      description
    }
  }
}
複数データの取得の戻り値
{
  "data": {
    "listTodos": {
      "items": [
        {
          "id": "2",
          "name": "test2",
          "description": "desc2"
        },
        {
          "id": "1",
          "name": "test1",
          "description": "desc1"
        }
      ]
    }
  }
}
2-6. Vueアプリケーションからバックエンド(AWS)のGraphQL APIを呼び出す
Vue > Tutorial > Connect API and database to the app > Connect frontend to API
GraphQL APIを使ってデータを書き込む。
Vueアプリケーションを書き換える。
src/App.vue
<template>
  <div id="app">
    <h1>Todo App</h1>
    <input type="text" v-model="name" placeholder="Todo name">
    <input type="text" v-model="description" placeholder="Todo description">
    <button v-on:click="createTodo">Create Todo</button>
  </div>
</template>

<script>
import { API } from 'aws-amplify';
import { createTodo } from './graphql/mutations';

export default {
  name: 'app',
  data() {
    return {
      name: '',
      description: ''
    }
  },
  methods: {
    async createTodo() {
      const { name, description } = this;
      if (!name || !description) return;
      const todo = { name, description };
      await API.graphql({
        query: createTodo,
        variables: {input: todo},
      });
      this.name = '';
      this.description = '';
    }
  }
};
</script>
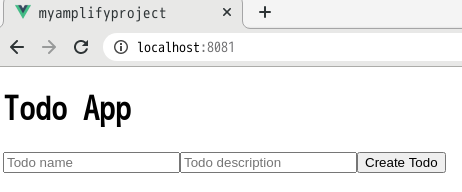
開発用サーバーを起動してブラウザ上からデータを書き込む。
$ cd /home/mizuki/workspace/aws/myamplifyproject

# 開発用サーバーを起動する
$ npm run serve
書き換えたVueアプリケーションのスクリーンショット。
GraphQL APIを使ってデータを読み込む。
Vueアプリケーションを書き換える。画面のインスタンスが生成されたときにデータを読み込む。
src/App.vue
<template>
  <div id="app">
    <h1>Todo App</h1>
    <input type="text" v-model="name" placeholder="Todo name">
    <input type="text" v-model="description" placeholder="Todo description">
    <button v-on:click="createTodo">Create Todo</button>
    <div v-for="item in todos" :key="item.id">
      <h3>{{ item.name }}</h3>
      <p>{{ item.description }}</p>
    </div>
  </div>
</template>

<script>
import { API } from 'aws-amplify';
import { createTodo } from './graphql/mutations';
import { listTodos } from './graphql/queries';

export default {
  name: 'App',
  async created() {
    this.getTodos();
  },
  data() {
    return {
      name: '',
      description: '',
      todos: []
    }
  },
  methods: {
    async createTodo() {
      const { name, description } = this;
      if (!name || !description) return;
      const todo = { name, description };
      this.todos = [...this.todos, todo];
      await API.graphql({
        query: createTodo,
        variables: {input: todo},
      });
      this.name = '';
      this.description = '';
    },
    async getTodos() {
      const todos = await API.graphql({
        query: listTodos
      });
      this.todos = todos.data.listTodos.items;
    }
  }
}
</script>
書き換えたVueアプリケーションのスクリーンショット。
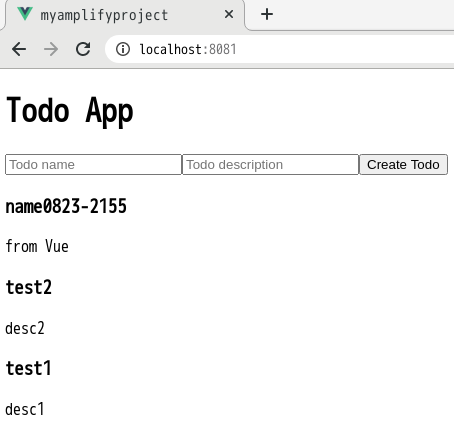
GraphQL APIを使ってデータの書き込みを購読する。
Vueアプリケーションを書き換える。画面のインスタンスが生成されたときにデータの書き込みを購読する。データの書き込みを行うと購読により画面のリストが更新される。
src/App.vue
<template>
  <div id="app">
    <h1>Todo App</h1>
    <input type="text" v-model="name" placeholder="Todo name">
    <input type="text" v-model="description" placeholder="Todo description">
    <button v-on:click="createTodo">Create Todo</button>
    <div v-for="item in todos" :key="item.id">
      <h3>{{ item.name }}</h3>
      <p>{{ item.description }}</p>
    </div>
  </div>
</template>

<script>
import { API } from 'aws-amplify';
import { createTodo } from './graphql/mutations';
import { listTodos } from './graphql/queries';
import { onCreateTodo } from './graphql/subscriptions';

export default {
  name: 'App',
  async created() {
    this.getTodos();
    this.subscribe();
  },
  data() {
    return {
      name: '',
      description: '',
      todos: []
    }
  },
  methods: {
    async createTodo() {
      const { name, description } = this;
      if (!name || !description) return;
      const todo = { name, description };
      this.todos = [...this.todos, todo];
      await API.graphql({
        query: createTodo,
        variables: {input: todo},
      });
      this.name = '';
      this.description = '';
    },
    async getTodos() {
      const todos = await API.graphql({
        query: listTodos
      });
      this.todos = todos.data.listTodos.items;
    },
    subscribe() {
      API.graphql({ query: onCreateTodo })
        .subscribe({
          next: (eventData) => {
            let todo = eventData.value.data.onCreateTodo;
            if (this.todos.some(item => item.name === todo.name)) return; // remove duplications
            this.todos = [...this.todos, todo];
          }
        });
    }
  }
}
</script>
3. VueアプリケーションにAmazon Cognitoを使ったユーザー名/パスワードのログインを追加する
3-1. 認証サービスをローカルに作成する
Vue > Tutorial > Add authentication > Create authentication service
$ cd /home/mizuki/workspace/aws/myamplifyproject

# 認証サービスを作成する
$ amplify add auth

Using service: Cognito, provided by: awscloudformation

The current configured provider is Amazon Cognito.

Do you want to use the default authentication and security configuration? (Use arrow keys)
❯ Default configuration <--
  Default configuration with Social Provider (Federation)
  Manual configuration
  I want to learn more.

Warning: you will not be able to edit these selections.
How do you want users to be able to sign in? (Use arrow keys)
❯ Username <--
  Email
  Phone Number
  Email or Phone Number
  I want to learn more.

Do you want to configure advanced settings? (Use arrow keys)
❯ No, I am done. <--
  Yes, I want to make some additional changes.

Successfully added resource XXX locally

Some next steps:
"amplify push" will build all your local backend resources and provision it in the cloud
"amplify publish" will build all your local backend and frontend resources (if you have hosting category added) and provision it in the cloud
3-2. ローカルに作成した認証サービスをバックエンド(AWS)へデプロイする
$ cd /home/mizuki/workspace/aws/myamplifyproject

$ amplify push

✔ Successfully pulled backend environment dev from the cloud.

Current Environment: dev

| Category | Resource name | Operation | Provider plugin   |
| -------- | ------------- | --------- | ----------------- |
| Auth     | XXX           | Create    | awscloudformation |
| Api      | myapi         | No Change | awscloudformation |
? Are you sure you want to continue? (Y/n) [y]

✔ All resources are updated in the cloud
3-3. VueアプリケーションにログインのUIを組み込む
Vue > Tutorial > Add authentication > Create login UI
既存の画面を"<amplify-authenticator>"で囲むとアクセスしたときにログインのUIが表示される。
<template>
  <amplify-authenticator>
    <div id="app">
      <h1>Todo App</h1>
      <input type="text" v-model="name" placeholder="Todo name">
      <input type="text" v-model="description" placeholder="Todo description">
      <button v-on:click="createTodo">Create Todo</button>
      <div v-for="item in todos" :key="item.id">
        <h3>{{ item.name }}</h3>
        <p>{{ item.description }}</p>
      </div>
    </div>
    <amplify-sign-out></amplify-sign-out>
  </amplify-authenticator>
</template>
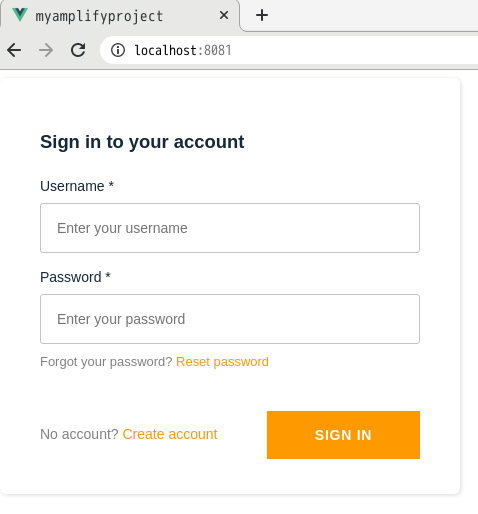
表示されるログインのUIのスクリーンショット。
表示されるアカウント作成の確認のUIのスクリーンショット。
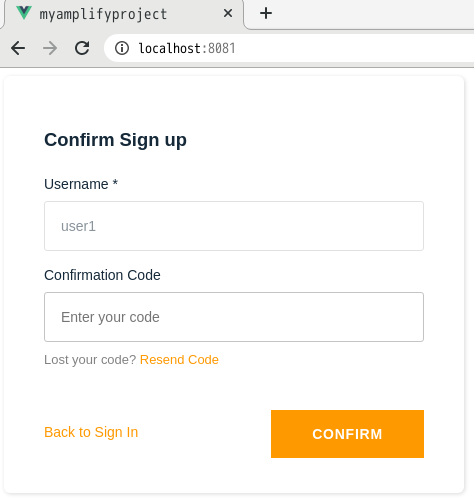
サインアップのフロー。
- ユーザー名、パスワード、Eメールアドレス、電話番号(+81)を入力する。
- Eメールアドレスに確認コードが届く。
- 確認画面に確認コードを入力する。
- アプリケーションの画面が表示される。
サインインのフロー。
- ユーザー名、パスワードを入力する。
- アプリケーションの画面が表示される。
サインアウトのフロー。
- サインアウトボタンを押す。
- サインインの画面が表示される。
参考
- Amplify Docs > Libraries > Authentication > Getting started
- ユーザーアカウントのサインアップと確認
Amazon Cognito から E メールを送信するアクションをテストするために E メールアドレスを使用する場合は、偽の E メールアドレス (メールボックスの存在しないメールアドレス) は使用しないでください。
- Amazon Cognito を使用した AWS AppSync リソースへのアクセス
4. Vueアプリケーションを公開する
4-1. 公開サービスをローカルに作成する
Vue > Tutorial > Deploy and host app
$ cd /home/mizuki/workspace/aws/myamplifyproject

# 公開サービスを作成する
$ amplify add hosting

# Amplifyコンソールで公開する
? Select the plugin module to execute (Use arrow keys)
❯ Hosting with Amplify Console (Managed hosting with custom domains, Continuous deployment) <--
  Amazon CloudFront and S3

# 手動で公開する
? Choose a type (Use arrow keys)
  Continuous deployment (Git-based deployments)
❯ Manual deployment <--
  Learn more

You can now publish your app using the following command:
Command: amplify publish
4-2. Vueアプリケーションを公開する
$ cd /home/mizuki/workspace/aws/myamplifyproject

$ amplify publish

✔ Successfully pulled backend environment dev from the cloud.

Current Environment: dev

| Category | Resource name  | Operation | Provider plugin   |
| -------- | -------------- | --------- | ----------------- |
| Hosting  | amplifyhosting | Create    | awscloudformation |
| Api      | myapi          | No Change | awscloudformation |
| Auth     | XXX            | No Change | awscloudformation |
? Are you sure you want to continue? (Y/n) [y]

✔ All resources are updated in the cloud

Publish started for amplifyhosting

> myamplifyproject@0.1.0 build /home/mizuki/workspace/aws/myamplifyproject
> vue-cli-service build

⠇  Building for production...

DONE  Build complete. The dist directory is ready to be deployed.
INFO  Check out deployment instructions at https://cli.vuejs.org/guide/deployment.html

✔ Zipping artifacts completed.
✔ Deployment complete!

# 公開されたURLが表示される
https://dev.XXX.amplifyapp.com